Installing blinds, shades, and shutters might look like a tough task, but it is actually an easy DIY project. It has many benefits such as it can give us privacy, light control and blocking the UV lights that can cause damage to the furniture. Installing these can also give your home a classic and elegant look. You have to choose what kind of modifications you want to do to your windows, whether you prefer an inside mount or an outside mount.
You are going to need the right tools for the job. The first thing you need to do is take measurements of the height and width of the windows wherever you want to install blinds, shades, and shutters. Taking proper measurements is one of the most important things, as it plays a vital role in installing and operating properly. When you have the correct measurements you can buy the right size of blinds, shades or shutters. You will also need some tools for the installation process such as a drill, screws, hammer, and measuring tape.
Blinds, shades, and shutters are window coverings that come in different materials and styles. Blinds made from wood or aluminium give a classic look, while shades made from plastic or polyester provide a softer touch to the room. Shutters, on the other hand, are a popular choice for those who prefer a traditional look. The installation process for these window coverings is simple, and anyone can do it with some effort, patience, and by carefully reading the instructions. This guide will explain how to install blinds, shades, and shutters on your windows.
Installation Guide for Blinds
1. Wood Blinds
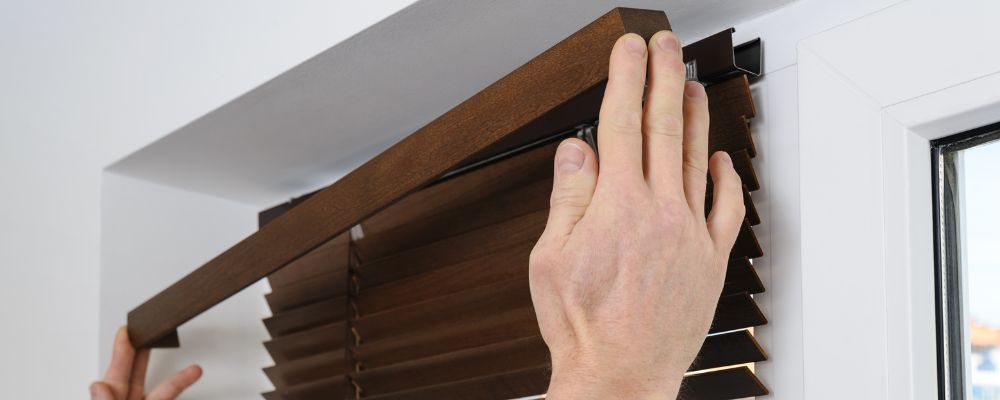
Inside Mount Wood Blinds:
If you are planning to install inside-mount wood blinds, then follow these simple instructions.
Step 1: The first thing you need to do is set the mounting brackets at the same level as the window frame. Use a pen, pencil, or marker to mark dots; it will help you remember where you need to drill for the screw holes. If you buy a blind that has a decorative valance, then you have to set your brackets a little back to have space for the valance. It is highly recommended to drill diagonal holes to make it easier to attach screws.
Step 2: On your first bracket, insert two screws and tighten it to the wall. Do the same for the other bracket on the other side of the window. Add supporting brackets on both sides to provide brackets with more strength. Use a measuring tape, preferably a steel tape, to measure and check the layout.
Step 3: Split the valance clips evenly so that there won’t be any interference with mechanisms inside the blinds. Insert the headrail into the brackets and press the bottom of the brackets upwards while lowering the front part. You will hear the sound of a snap when it fits in its place.
Step 4: To install the valve, you simply need to snap it into the valve clips. After everything is in its place, simply test your new blinds by pulling the cord lower and raising the blinds. You can adjust the slats by tilting the cord or rotating the wand.
Outside Mount Wood Blinds
If you are planning to install outside-mount wood blinds, then you need to follow these instructions.
Step 1: Place your blind on the window and mark the left and right corners of the window with a pen or pencil. You have to be sure that your blind is in the centre and levelled properly. Attach the first bracket with screws, and repeat the process on the other side with another bracket.
Step 2: If your blinds have a centre support bracket, then make sure to install it a little off-centre and above the sections of the headrail. Doing this will stop any sort of interference with the function of the blind cord. You also have to be sure to connect the valence slips with the headrail while giving them some space so they won’t create problems with the instruments inside the blinds.
Step 3: To install the window treatment, you need to insert the headrail into the brackets. When the headrail is in place, you need to use your thumbs to reach the bottom of the bracket and drop the front part of the bracket. It will make a snap sound once it is attached. Next, you need to attach the side of the valance. By using the L-brackets that usually come along with the blinds. Connect the valve with pre-installed clips, and you will be done installing your window.
Step 4: It’s time to test your blinds. By pulling the cord, you can slowly raise and lower the blinds, and you can adjust the tilt cord or rotate the wand to tilt your slats.
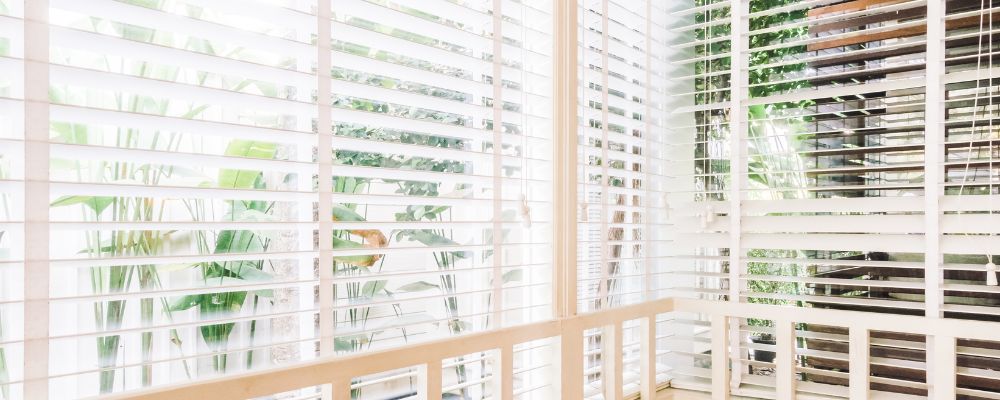
2. Mini Blinds
Inside Mount Mini Blinds
Step 1: Place your mounting brackets at the points where they align with the level of the window frame. Take a pencil and mark the place for the screw holes. Make holes by using a drill machine. You can make diagonal holes, as it gives more security to the installation. Tighten two screws on brackets on both sides of the windows.
Step 2: You can also install additional support brackets to reinforce the brackets and use a steel measuring tape to check if they are on the right level. Click the valance clips over the headrail and make sure to space the valance clips so that they won’t cause problems in the mechanism of the blinds.
Step 3: Slip the headrail into the brackets and close the bracket covers by pushing up the bottom part of the bracket while at the same time lowering the front part of the bracket until they get attached. Connect the valance to the valance clips.
Step 4: Time to test your new blinds. Try pulling the cord to raise and lower your blinds, and use the tilt cord or rotating wand to tilt your slats.
Outside Mount Mini Blinds
Step 1: Place your blind on the surface of the wall where it will be fixed. Take a pencil to mark both the left and right outside boundaries, as well as the base and slides. Line up the side and bottom of the first bracket through the inside of the pencil marker and fasten it to the wall screws. Repeat the same process for the second bracket.
Step 2: For installing a centre support bracket, it is highly recommended to install it just a little off-centre outside the section of the headrail. By doing this, it won’t interfere with the process of the blind cord. Fix the valance clips over the headrail and split the space between them evenly so they won’t interfere with the mechanism inside the blinds.
Step 3: Put the headrail into the brackets and close the bracket covers by squeezing up on the bottom part of the bracket while lowering the front part of the bracket until they snap into place. Connect the sides of your valance by using the L-brackets that come with the blinds. Attach the valve to the pre-installed clips.
Step 4: Once you are done with all the work, try testing out your new blinds. Pull the cord to see if it is raised and lowered properly. Use the tilt cord or rotate the wand to see if the tilt slats work properly.
3. Vertical Blinds
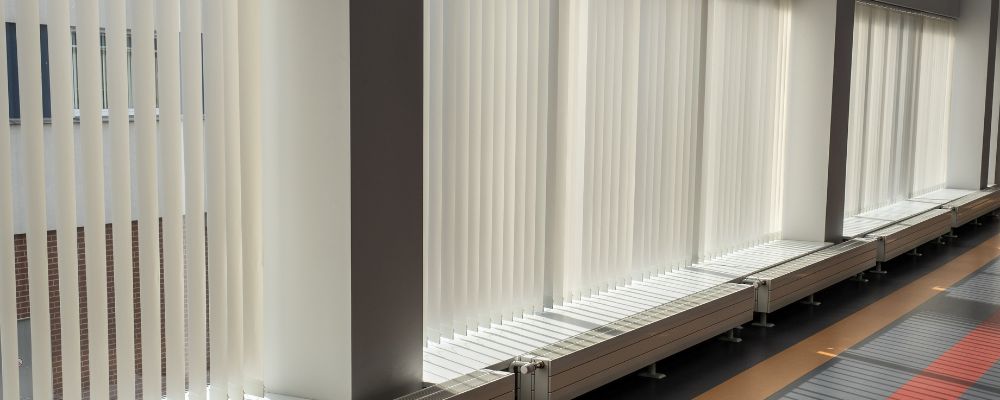
Inside Mount Vertical Blinds
Step 1: Align your valance facing the room with the edge of the window, and use the bracket clips to mark holes for the screws. You can use a hammer or a drill to insert screws. It will be better and easier if you insert screws through the valve.
Step 2: Tap the starter holes lightly through the slots of the bracket and mark where the screws will go. Tighten up the screws through the valance and into the surface of the brackets. Attach the front to the headrail into the brackets and rotate it till it tightens to its place.
Step 3: For installing the vanes, you need to start pulling the cord to give space evenly to the stems of the vane. Rotate the openings of the stems facing your side. Hook the first cane by simply sliding it up into the stem until it snaps into place. Then repeat the same process for all the remaining vanes until every single one of them is attached.
Step 4: Keep your cord tight. Place the bracket outside the window frame at the bottom so it won’t interfere with the function of vertical blinds. After installation, try testing your vertical blinds by opening and closing them using the cord. You can use the beaded chain to rotate the blinds.
Outside Mount Vertical Blinds
Step 1: Measure from the bottom of your window to the top of the window where your blinds will be hung. Once you have taken the correct measurement, use a pencil to mark the top of the window and 3 inches from each end of the headrail.
Step 2: To install the brackets, you first need to level the top of your left bracket throughout the length of the pencil line. Tighten the screws to the wall, then repeat the same process for the right side of the additional brackets. Make sure the brackets are in a straight line and level with each other.
Step 3: To install the headrail, you need to attach the front to the brackets and push the backside upwards until it snaps into place. Then you need to pull the cord to create space evenly, then use the chain to rotate them until they are facing towards you. You can install the vane by simply sliding it upwards to the plastic stem until it snaps into place. You need to continue repeating this process until all vanes are attached.
Step 4: Attach the safety brackets to keep the cord tight. Hook it to the outside bottom of the window frame. Connect the valance clips to the headrail and slide the valance into the clips. Once you are finished with the installation, test the blinds by using the pull cord to raise and lower them, and adjust the slats by adjusting the tilt cord or rotating the wand.
Installation Guide for Shades
1. Cellular Shades

Inside Mount Cellular Shades
Step 1: Take a measuring tape and leave 2 ½ inches on both the left and right sides of the window. Place your brackets on top of the window and use a pencil to mark the places for the screws. Make sure that the brackets are in a straight line.
Step 2: Insert the screws into the brackets and create starter holes by hammering the screws, or simply use a drill to tighten the screws. You have to be sure that the brackets are in the right place.
Step 3: Add supporting brackets to provide extra support. It can be needed based on the width of your cellular shade. Install the headrail by connecting it to the front part of the bracket and then pushing it back to hook it in place.
Step 4: Once you are finished with the installation of the shades, try it out by lowering them slowly to be certain that the feature works properly. Don’t forget the stopping feature so that you can keep the shade the way you want it.
Outside Mount Cellular Shades
Step 1: Place your shade on the wall and make sure that the shade is in the centre and at the level of the window. Take a pencil and mark the top of the headrail. Make sure you leave 2 ½ inches of space on both sides of the shade.
Step 2: Create starter holes by gently hammering the screws with a hammer. Tighten the screws with a screwdriver or use a drill machine. Make sure to use drywall anchors when you are working on the drywall with no studs.
Step 3: Take the left bracket and place it along with the pencil marking, tighten the screws, and then repeat the process for the right bracket. Add support brackets on behalf of the width of the cellular shade. Lastly, install the headrail by connecting the front of the bracket and pushing it back to hook it into its place.
Step 4: Time to test your new shades by lowering them and pulling the cord towards them. Pull the cord to the right to raise or lock the shade.
2. Roller Shades
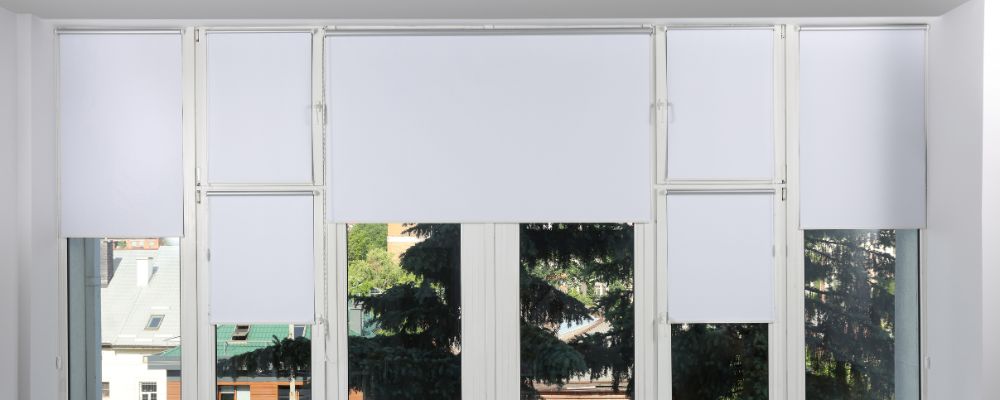
Inside Mount Roller Shades
Step 1: Place your brackets on your window, leaving 2 ½ inches on both sides. Take a pencil to mark the locations for the screws, and use measuring tape to check if the brackets are in a straight line.
Step 2: Create starter holes by drumming the screws with a hammer or simply using a drill to fix the brackets in their place. You can add support brackets if required by the width of your cellular shades.
Step 3: At the end, install the headrail by connecting the front of the bracket to the headrail and pushing it back until it snaps into place.
Step 4: After finishing the installation process, test your new shades by slowly lowering them to make sure the movement of the shades is smooth. You can adjust the shades the way you want.
Outside Mount Roller Shades
Step 1: Place the shade in your desired position and use a measuring tape or a levelling tool to make sure it is in the centre and level. Mark both ends with a pencil.
Step 2: Leave 2 inches from each pencil mark. Spot the position for the brackets and leave ½ inch of space from the top of the window. Place the brackets in the mark and mark the location for screw holes.
Step 3: To make it easier, you can create screw holes by gently beating the screws with a hammer or simply using a drill to tighten the screws. Insert the front groove of the shade back bar into the bracket’s lip and rotate it until you hear a snap.
Step 4: Test your new shade by pulling the shades slowly to make sure of the proper moment across the shade. Also, test the stopping feature of the shade so that you can adjust the shades exactly the way you want them.
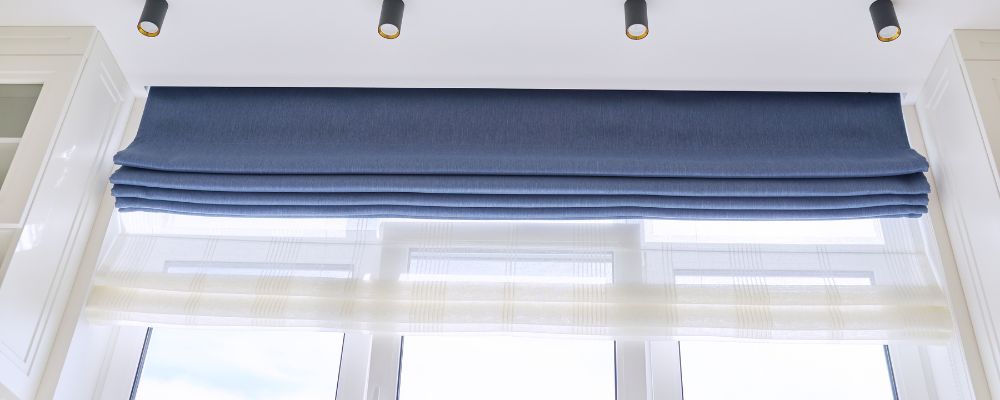
3. Roman Shades
Inside Mount Roman Shades
Step 1: Place your brackets into the holes of the headrail and mark the places with a pencil. Hold the bracket in place of the pencil mark and leave ¼ inch of space on both sides of the window. Mark the location of the screws with a pencil.
Step 2: Make sure the brackets are straight by using a measuring tape or a level tool. Create starter holes by tapping the screws with a hammer, and then tighten them up using a screwdriver or a drill machine.
Step 3: Fasten the screws in the brackets at the right place, and then you can install the headrail by hooking the front of the bracket and rolling it back to snap into place to install the headrail.
Step 4: After finishing the installation, it is time to test your new shades. By pulling them, you can ensure the proper movements across the shades and the stopping feature to make sure that you can keep the shade exactly the way you want it.
Outside Mount Roman Shades
Step 1: Find the slots in the headrail and insert the bolts of the bracket in the slots. Hold the headrail in the place where the shades will be installed and mark the tops of the brackets. You have to make sure that the shades are centred and levelled.
Step 2: Hold the brackets into the marks and create new markings for the location of the screw holes. To make it easier to tighten the screws, you can create starter holes by using a hammer or a drill.
Step 3: Secure the shade by lining up the bracket bolts with the slots on the headrail and fastening with wingnuts.
Step 4: Test your new shades by pulling them slowly to be sure of the proper movement of the shades, and test the stopping feature so that your shades can be adapted exactly the way you want them.
Installation Guide for Shutters
Installing shutters in your home can be a great idea with the help of expert or professional shutters installers, as it has many benefits. Shutters give an elegant look to the house as they come in different styles, colours, and materials. Adding them can be a great investment too, as it can raise the value of the house as well. Shutters are very easy to clean, and that makes them an excellent choice to go with in place of other home window coverings. They do not collect dust quickly and can be easily wiped with a cloth.
Shutters can also provide security to the home, as they have an extra layer of protection against break-ins and can work like a barrier from thieves. Shutters have so many benefits that it is no surprise that they are a very popular choice for homeowners who are looking to upgrade their homes in terms of style, functionality, privacy, and adding value to their homes.
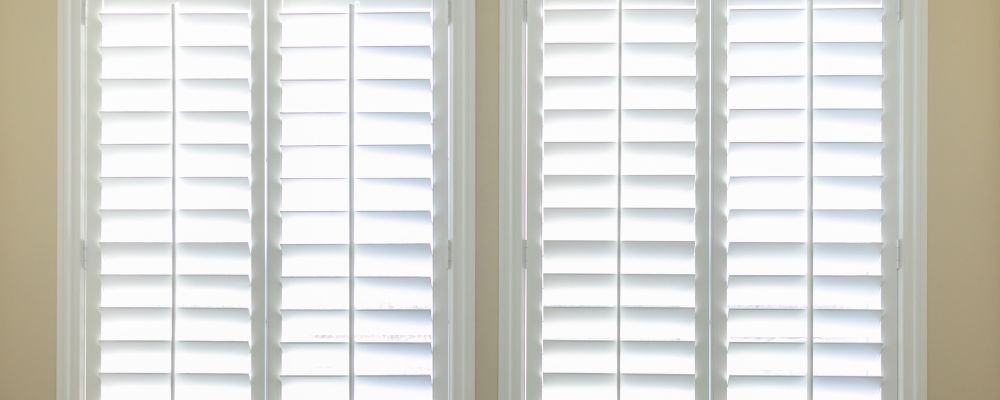
1. Interior Shutters
Inside Mount Interior Shutters
Step 1: First, you need to properly assemble the layout of the frames and strips. Try to avoid any scratches and match the right corners for a proper fit. Assemble the frame by tapping the key into the slots on the back of each frame.
Step 2: You need to check if the frame on the inside of the window opening is in the centre and level. If you are using hanging strips, then attach them to both sides of the opening to make sure that the panels are close to the wall. When the frame is in the right place, screw the frame into the wall.
Step 3: Insert the hinge pins in the frame by attaching the panels. You have to be sure that there are no gaps when you test your shutters. Open and close the panels to check the proper alignment between the panels.
Step 4: Attach the button catch by putting the catch on the window frame, then screw the catch into the frame. Place a strike plate on the catch and close the panel. Take a pencil to mark the location of the button. The button should be installed ½ inch from the edge of the stile. Lastly, remove the catch and tighten the screw in the panel.
Outside Mount Interior Shutters
Step 1: You need to find a working space to assemble your frame. Match the corners and tap the key into the slots on the back of each frame.
Step 2: To install the shutters, you need to centre and level the frame outside the opening of the window. Screw the frame into the wall in three places: the top left and right corners and the top middle. Attach the panels to the frame using hinge pins.
Step 3: Align the shutters without the gaps and secure the frame with some extra screws. Attach the button catch to the window frame ½ inch from the inner edge of the stile, and then screw firmly into the frame.
Step 4: To find the proper location, place the strike plate into the catch and close the panel. Mark the place with a pencil where the button should be on the panel. Remove it from the catch and screw it into the panel.
2. Bahama Shutters

Inside Mount Bahama Shutters
Step 1: The first step is to measure the width, height, and depth of the window. Once you have the measurements, you can choose the type of Bahama shutters you want to install, as there are different types like wood, aluminium, and vinyl.
Step 2: You will need to prepare the shutters before installing them. For installation, you will need to attach hardware like hinges and latches. You will need to install the brackets in the frame of the window. When the brackets are installed, it is time to hang the shutters. Attach the shutters to the brackets and make sure they are in a straight line.
Step 3: Once you hang the shutters, you will need screws to connect them to the brackets. This will make sure that the shutters are properly attached. You might need to make some adjustments to confirm that the shutters are opening and closing properly.
Step 4: After finishing the installation process, it is important to test the shutters to make sure that they are functioning properly. Try closing and opening them a couple of times to make sure they are working smoothly without any issues.
Outside Mount Bahama Shutters
Step 1: If you want to install an outside-mount Bahama shutter, then first you need to take accurate measurements of the height and width of the window.
Step 2: Clean the surface of the window where you want to install shutters. You will need brackets and screws for the process.
Step 3: Place the shutters in the location and make sure they are level. After that, use the screws to attach the shutters to the brackets.
Step 4: The final step of installation is testing. Test your new shutters by opening and closing them a few times to check if they are working properly.
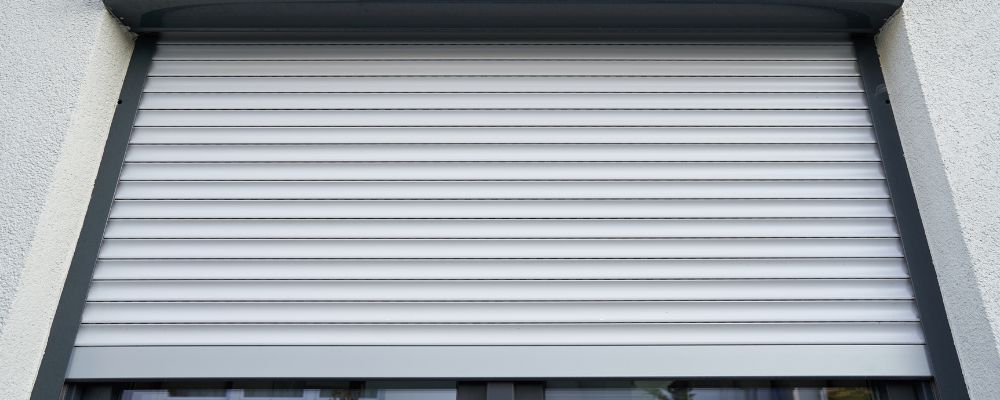
3. Storm Shutters
Inside Mount Storm Shutters
Step 1: The first step in the process of installation is to take the measurements of the windows. It is vital to take precise measurements to be sure that the shutters will fit properly. Use a measuring tape to measure the height and width of the window frame.
Step 2: It is important to ensure that the frame of the window is clean for the installation process. You will need to attach the brackets to the window frame, as these brackets will be holding the shutters. Fasten the brackets with the screws.
Step 3: You need to attach the shutters to the brackets by pushing them down until they snap. Make sure that the shutters are levelled properly.
Step 4: It is important to test the shutters and make sure that they are walking properly. If there’s any issue, you can adjust the brackets to fix the problem so that the shatter can work smoothly.
Outside Mount Storm Shutters
Step 1: The first thing you need to do is carefully measure the window openings where the shutters will be installed. It is important to have the correct measurements so that the shutters can fit perfectly.
Step 2: You will need materials like brackets, screws, and other hardware. When you have the materials, you can start preparing for the installation. Clean the window and remove all the dirt, as windows must be in good condition to be able to support the weight of the shutters.
Step 3: The next step is to install the brackets, as these brackets will hold the shutters in place, so it is very important to read the instructions for the proper placement of the shutters. Make sure that the brackets are attached correctly to give maximum support.
Step 4: After completing the installation, it is important to check if they are working correctly. Try opening and closing it a few times to see if there are any adjustments to be made in the shutter to function smoothly.
Conclusion
Having a home that is comfortable to live in and has proper privacy and security is crucial for all. The best way to make your household as such is by installing blinds, shades, and shutters. Not only do they give your domain a classic look, but they also allow you to take full control over the amount of light that enters it.
Your nosy neighbours will no longer be able to take a peek into your homes. In addition to being easy to clean and maintain, they are a great choice for anyone who is looking to upgrade their home to make it more stylish and comfortable without burning a hole in their pocket.
Frequently Asked Questions
The time taken to install shutters can depend on the material. Normally, it takes around 3–4 hours for the installation process.
The time to install blinds depends on the person and the material of the blinds. Generally, it will take 20–30 minutes, which includes bringing everything. Other blinds might take 10–15 minutes to install.
A shutter can last up to 20 to 25 years because it is built from hard materials like wood and aluminium. They don’t easily break down.
Installing shades can be an easy DIY project. All you need to do is choose the type of window treatment and decide if you want to go with the inside mount or outside mount process.
